Google Analytics is a free service from Google that allows you to collect all the necessary statistical information about your website, its visitors, and the target actions on the site.
In this article, we will look at how to register with Google Analytics and how to install the Google Analytics counter on your website.
You can ORDER the setup of Google Analytics
1. First, go to the Google Analytics page (www.google.com/analytics/) and click “Sign up”. This is where we will get the Google Analytics code.
2. You will see brief information about registering for the Google Analytics service. Click “Sign up”.

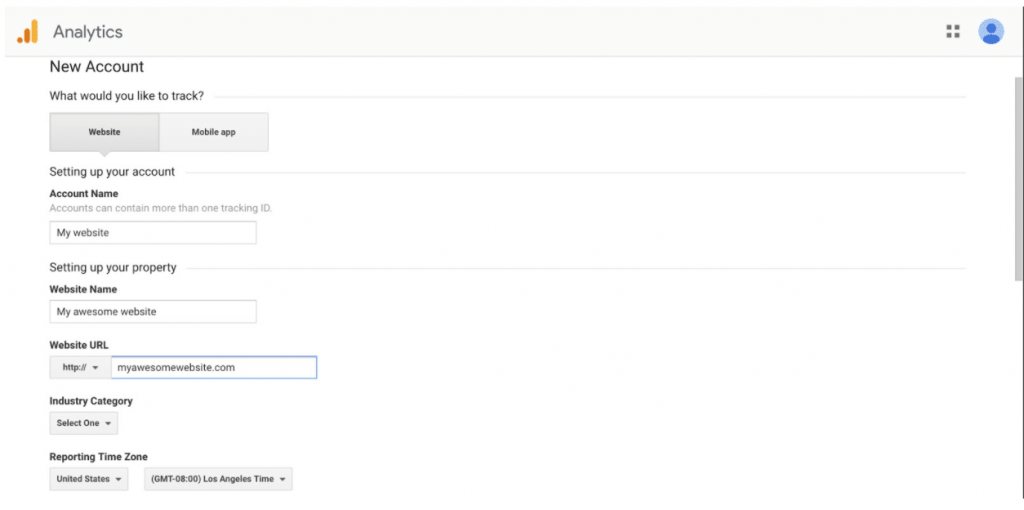
- You are prompted to fill out a form to create a new account. First, enter the account name, you can choose any name you like.
- Next, enter the website name. This is the name, not the URL. Again, this is for you to understand which site it is, as you can register many sites.
- Now enter the website URL in the corresponding field. Simple so far? 🙂
- Next, the Google Analytics service offers to choose an industry − try to find it in the dropdown list. However, this is optional.
- Then select the time zone.
- Next, we see the Data Access Settings section. Make sure all checkboxes are selected, this is useful. It will help you in your future work with the Google Analytics service.
- We can choose whether to install the old, but proven Universal Analytics code (valid until 07.2023) or the new Google Analytics 4.
All set, click – “Get Tracking ID”. This way, we move on to the main part – creating and installing the Google Analytics counter.
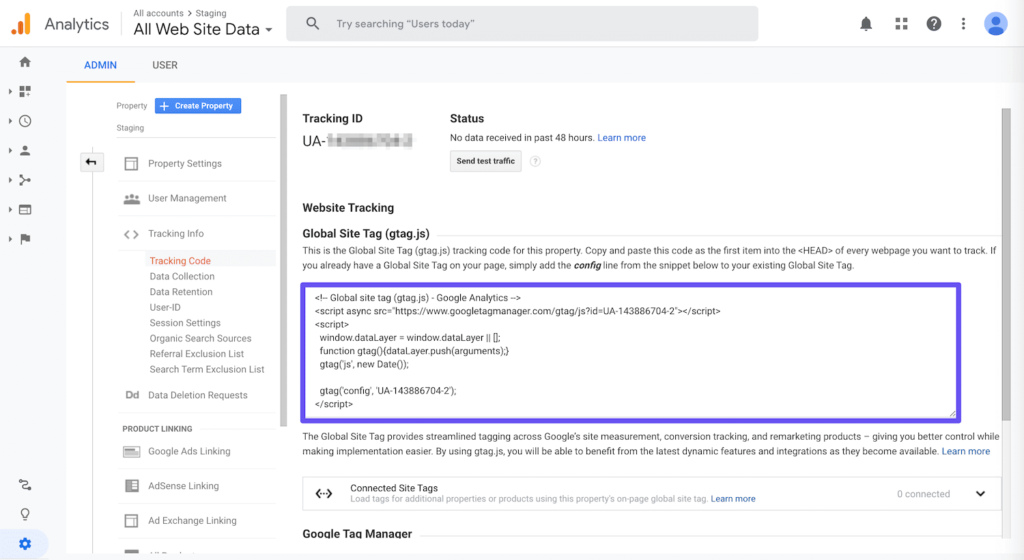
You will be redirected to a page with the Google Analytics tracking code. Copy the Google Analytics code. This is what we need to install on the site.
Installing Google Analytics on the site
After copying the Google Analytics code, proceed to install it on the site. If you have a webmaster or programmer, you can send the code to them. But if not, we will do everything ourselves. Moreover, adding the Google Analytics code to the site is quite simple.
Google recommends placing the code on every page of the site before the closing </head> tag.
- If your site does not use a CMS, and is custom-built, for example, a simple HTML landing page, then go to the file of your page. You can open the file with any text editor, like Notepad or Notepad++ (The folder with your site is located on your hosting. Check with your hosting provider on how to find it).
- Find the </head> tag. To do this faster, you can use the search function. The default key combination is Ctrl+F.
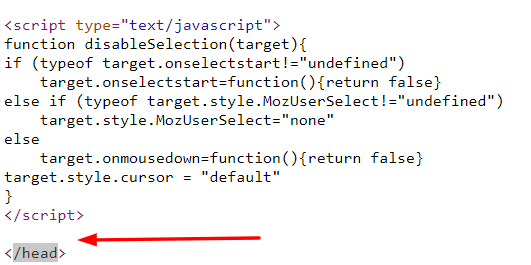
- And right before the desired tag, insert the Google Analytics code.
Voilà! Data on this page will soon begin to be collected and transmitted to your Google Analytics account. Repeat the procedure for each page of your site.
Installing the Google Analytics counter code for WordPress
If your site uses any CMS, for example, WordPress, then the installation of Google Analytics is even easier.
- Log in to your site’s console, click on “Appearance” − “Editor”.
- In the right column, find the header.php file (Header).
- And in this file, find the </head> tag and install the Google Analytics tracking code before it.
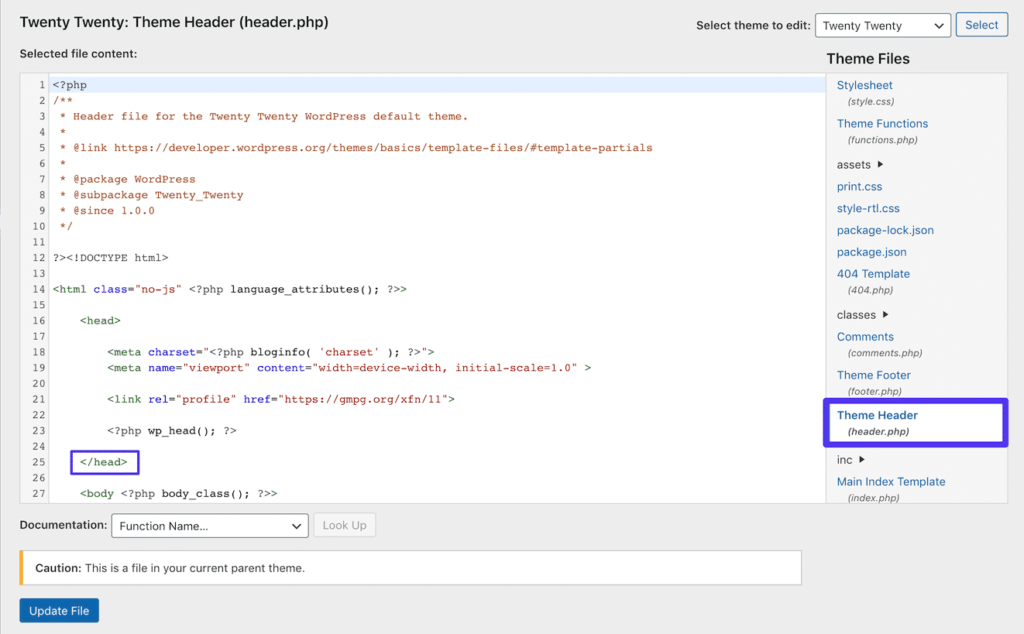
The code from this file is pulled onto all pages of your site. So it’s enough to install the counter just once to cover the entire site. That’s it, you did it!
You can ORDER the setup of Google Analytics
Now we have figured out how to install the Google Analytics code on the site. It’s quite simple. And once you do it the first time, it will be even easier afterward. Good luck!
